WS_FTP
This page is for those participants who will be using WS_FTP to transfer files. Those participants using Mac machines should refer to the pages concerning file transfer using Fetch. Rights to upload to a server must be established prior to actual file transfer. You must get the server name and password information from your facilitators before utilizing this software.
Prerequisites:
- An understanding of the concept of file transfer
- A copy of the program
WS_FTP for Windows (~700K)
Click on the link to download it. This is a light version that is free for educational use. It is a self-extracting archive, so decompression software is not needed.
Purpose:
- To learn how to use the program WS_FTP
- To upload files to a remote server
| Downloading a File | Downloading a Folder | Uploading | Tutorial Animations for WS_FTP |
Lesson:
WS_FTP is a program for transferring files from a Windows machine. It uses the file transfer protocol (ftp) from a remote machine to your local machine, or from your local machine to a remote machine. WS_FTP is free to users affiliated with an educational institution or charitable non-profit organization.
Downloading
Downloading a File
 Tutorial
animation available
Tutorial
animation available
- Open WS_FTP.
- The "Session Properties" box pops up to allow you to
enter the profile name, host, user & password. These will
be provided to you by your facilitator. Below is only a
sample screen.
- Establish a profile name. This is used only by your machine. It is not something that is specified by the server.You can make the profile name anything you want. It will not be specified by a facilitator.
- Enter the host (can be letters or numbers).
- Enter the user ID (or put "anonymous"). You can place a check mark in the "Anonymous" box if you prefer.
- Enter the password if there is one, (could be your e-mail
address), or leave it blank.
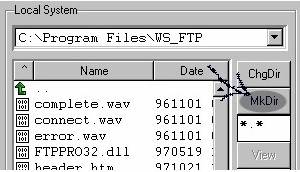
Indicate a directory if one is known--pub is frequently used as a directory accessible to the public. - Once you are "in" or connected, you will see the "Local
System" (your machine) on the left and the "Remote System"
(the server) on the right. Go to the file you want by
clicking and opening directories/folders.
- The location (on your machine) where you would put the
file being transferred must be indicated. Be sure to note the
folder (location) that you select. If you want to create a
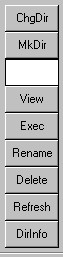
new folder you can use the button "MkDir".
- You can select the file you want to get (download) by
clicking on it once as it is displayed in the Remote System
(right side of screen). Be sure to check where the file is
going to go to on your local system. To download the file you
can double-click on it, or click once on the arrow pointing
to the left. Please note: Your ability to put a file
is not available on most sites. Most sites only allow you to
get a file but not put a file.
- You must close the connection when finished by using the CLOSE button at the bottom of the main screen (not the login screen).
Activity:
If you feel you want practice using WS_FTP, try downloading a file from the following location:
(Place the file on your desktop for easier discard later.)
- various fairy tales: host address: ftp.funet.fi, user ID:
anonymous,
path or directory: /pub/doc/literary/etext/fairy-tale
Downloading a Folder
Tutorial
animation available
- Repeat steps 1-7 above (Downloading a File).
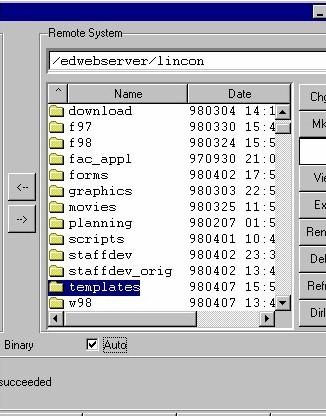
- Locate the folder that you would like to get (download). Click once on the folder to select it. Be sure not to double click. Double-clicking will open the folder and you will have to back up and try again. Be sure that the "Auto Detect" option is checked at the bottom of the WS_FTP window. When this option is marked, it will override the choice of ASCII or Binary. It does not matter that the radial button stays marked.
- The location (on your machine) where you want to put the file being transferred must be indicated. Be sure to note the folder (location) that you select on the Local System (left side of the window, your machine). If you want to create a new folder you can use the button "MkDir".
- Now you are ready to get (download) the folder. With the
folder highlighted (selected), click once on the left arrow
to begin transferring the folder.

- You must close the connection when finished by using the CLOSE button at the bottom of the main screen (not the login screen).
|
|
|
|
|
|
Tutorial Animations for WS_FTP |
Tutorial animation
available
The Basics of Uploading Files
- Start or open WS_FTP.
- Establish a profile name. This is used only by your machine. It is not something that is specified by the server.
- Fill in:
- the name of the remote computer you want to put files on in the "Host Name/Address" field.
- your user ID; this will be provided to you by your facilitator.
- your password; this will be provided to you by your facilitator.
- Click on "OK" to establish a connection one the remote server (the computer on which you are going to put the files.)
Before you begin transferring files, you should check the name of the folder or file you are about to upload. Remember it should contain:
No Other Unusual Characters ( < > ) ? & ...
Please rename your folder or file if it does not follow these rules.
Also, try to use a name that will be unique to you. For example, the folder names "html" or "Project" or the file name "homepage.html" are not very unique, so using names like these is "asking for trouble."
When you get onto the remote computer, select folders until you get to where you want to upload your file(s). It is likely that you will only have access permission to one folder on the server. Be sure that you have selected that folder to try uploading into or you will get error messages. (Your access privileges will be established by your facilitator.)
Take a look at the files/folders that are already on the remote computer and
by uploading a folder or file with the same name. Rename your local folder or file if you need to.
If you are uploading a single file, locate the file on your
local system (the window on the left side). Click once to
select it. 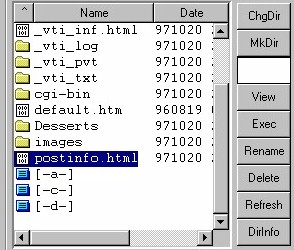
Be sure that the "Auto Detect" option is checked at the bottom
of the WS_FTP window. When this option is marked, it will
override the choice of ASCII or Binary. It does not matter that
the radial button stays marked.![]()
You can send the file by double-clicking on it, or you can
click once to select it and then use the right arrow button to
send it to the Remote System.![]()
You must close the connection when finished by using the
CLOSE button at the bottom of the main screen (not the login
screen).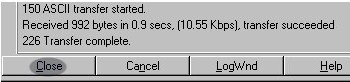
URL for Your Uploaded Files
If you have uploaded files onto a machine that is a Web server, and you have uploaded your files into a folder that is served by that machine's Web server, then you can immediately use Netscape to look at the files you just uploaded.
But what is the URL? Your URL is
computer.domain.type is the name of the computer you just uploaded your file to. (Example: www-ed.fnal.gov)
/folder1/folder2/ is the name of all the folders you went through on the remote machine when you were selecting where to upload your files/folder. (Example: /linc/spring96/projects_linc2/scavhunt/)
filename.html is the name of one of the files you uploaded. (Example: start.html)
So for the example above, say I uploaded a folder called scavhunt that contained a file called start.html. I uploaded the folder onto www-ed.fnal.gov inside of the linc/spring96/projects_linc2 folder. The URL would be:
Using this as a guideline, what URL would you use to look at the files that you just uploaded?
Remember that if you change your files, you must use WS_FTP to upload the changes, AND you must use Netscape's RELOAD button to look at any changed files you uploaded.
Uploading a Folder Instead of a File
If you want to upload a whole folder:
-
- Find the folder you want to upload on your local
computer, click once on it to select it.

- Navigate into the correct location on the Remote System.
Remember that you should be careful where you are sending
things so that you do not accidently write over someone
else's work on the server. Use the right arrow button to send
the folder you selected to the Remote System.

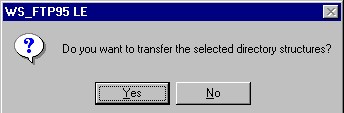
- You will be asked whether you want to "transfer the
selected directory structures." Choose "Yes" and the folder
will be uploaded.
Deleting or Renaming a Folder or File
- Find the file or folder on the remote computer that you
want to delete or rename. Click once on it to select
it.
- Use the Remote System menu to select Delete
or Rename file.
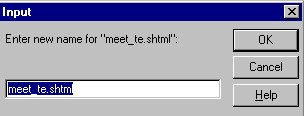
- If you are deleting, WS_FTP will ask you if you are sure
you want to delete. If you are renaming a file, WS_FTP will
ask you for the new name.
Once you have the rights on the remote server to upload, you are ready to place files in the directory or directories indicated. This will apply to pages to be placed in your portfolio or to your project pages. Check with your facilitator for the login, ID, etc. information you need to give you permission to upload to your course server.